Overinflation and underinflation issues often give beginner motorbike riders quite a headache. They struggle to settle on an ideal tire PSI level for their bikes, which results in uneven tread depth, lackluster road grip, and even accidents.
Although bike models are not exactly identical, there is a one-size-fits-all guide to navigate their PSI – and I am here to help you with that. Keep scrolling for more tips on motorcycle air pressure in tires!
Table of Contents
What PSI Should Motorcycle Tires Be?
The recommended pressure range is about 28 to 40 PSI, though it’s usually based on the motorbike and rider’s weight. The most common is 32 PSI for the best traction. Check the owner’s manual and consider pumping more or less if you are heavier or lighter.
Also, it would be best to leave a gap of 5 to 10 PSI between the motorcycle tire pressure front and rear due to their dissimilar weight distribution. Feel free to lower the PSI on poor-shaped or wet roads.
1. Based On Bike Types
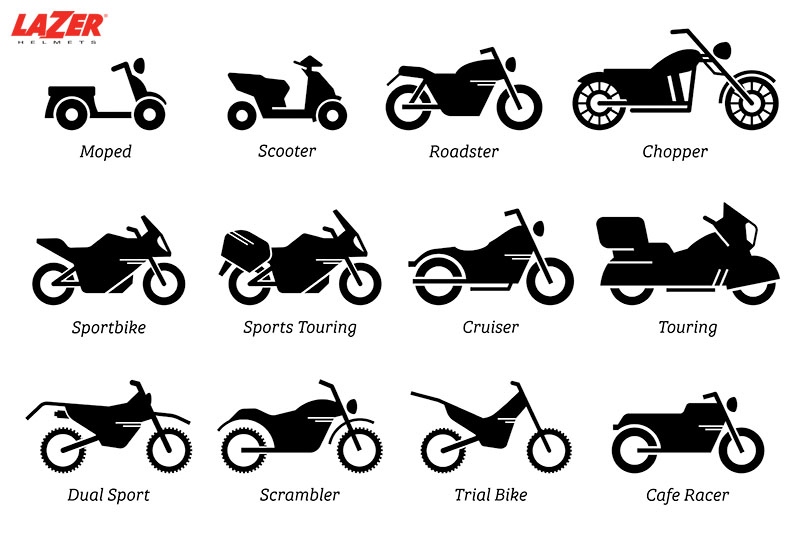
Different motorcycle models and brands will have different PSI recommendations for the tires. Nevertheless, the consensus is about 28 to 42 PSI; exceeding 42 PSI is rare even for cars and four-wheels, let alone motorbikes.
Aside from the ideal PSI levels, manufacturers also specify the maximum safety pressure (which you should only allow as a last resort or in extreme emergencies). Remember that these numbers must be measured when your bike has cold tires.
You can find the info listed in the manual or on the bike’s frame placard. If you fail to locate it, check the matter with your manufacturer.
In most cases, heavier motorcycles tend to demand higher tire pressures due to their weight and capacity. Meanwhile, dirt bikes should run at low pressures for a smoother ride.
2. Based On The Tires and Body Weight
Remember that bike manufacturer recommendations for PSI are often based on male riders’ average weight (about 160 pounds). Needless to say, it does not always apply to bikers of heavier or lighter weight.
So instead of blindly following the brand’s guidelines without further questions, it is important to personalize them to your specific case, too.
Consider choosing the upper end of the brand’s pressure range if you are a heavy rider. For instance, suppose the recommendation is 28 to 40 PSI; then inflate your tires from 33 PSI onwards.
Likewise, light riders should settle on the PSI of the lower end of the spectrum, from 28 to 33 PSI. That way, pinch flats will be kept at bay, offering you a more comfortable and supple ride.
Plus, remember that your weight is not distributed evenly between the rear and front tires. Unless your bike has a completely different design from the market’s standard, most models tend to pool the weight to the rear wheels rather than their front wheels.
Hence, it would be best to pump your rear tires 5 to 10 PSI more than your front tires to accommodate the extra weight. On the contrary, since front tires take charge of guiding and steering the bikes, less pressure (5 to 10 PSI fewer) is more than welcome.
As such, the contact surface between them and the ground will increase, giving your ride more stability and grip.
And in some cases, you might want to consider the tire width, especially on off-road terrains. Wide tires, though heavier than narrow tires, can tolerate lower pressure than average to reduce jolts and bumps while improving the rolling resistance.
3. Based on Terrains
If smooth, comfortable rides on gravel roads are your top priority, 40 to 42 PSI should be the safest bet. Lowering the level does not hurt, either, as it gives the bike more flexibility and better safety.
High-pressure tires, on the other hand, are more vulnerable to punctures, even popping off rims if the bike accidentally hits big potholes.
Riding type should also be considered a criterion:
- For street riding: 35 PSI to 40 PSI will be great.
- For tough terrains: Try to weigh the pros and cons of low and high pressure. If needed, gradually lower the tire’s pressure and test-ride after each adjustment to inspect the effects.
The road conditions and precipitation are important, too. For instance, running on slightly lower pressure on wetter days would be highly recommended, as it gives your tires broader contact surfaces and better grip.
Similarly, local roads of poor shape would suit low-pressure better than high-pressure, providing a more convenient ride.
How to Check Your Motorcycle Tire PSI With A Gauge
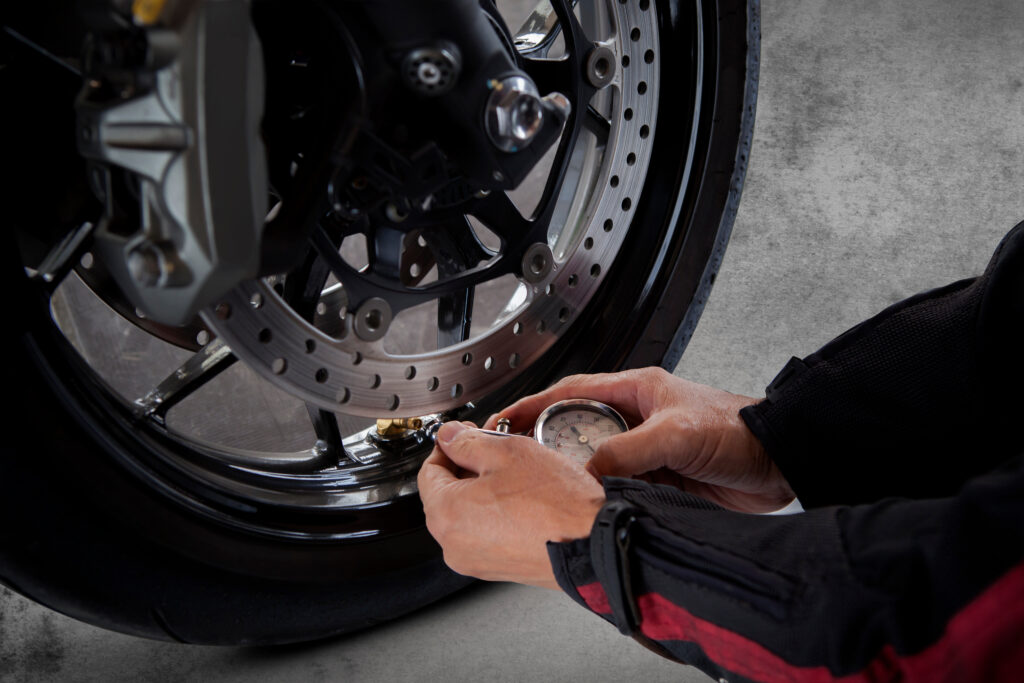
Check the motorcycle air pressure in tires with a gauge and adjust it to the manufacturer’s level with a pump (basic pumps should do, but you may also use workshop compressors or electronic pumps).
Once done, warm up the tires via test rides and measure again: the warm pressure should be 10%/20% higher than the cold pressure for front/rear tires.
The full guidelines are as below:
Step one. Put the tire valves on the front wheels, then position your bike so the valve stems are on the wheels’ lowest part, as close to the road/ground as possible.
Step two. Remove the valve cap, then press the pressure gauge on your tire valve. Bikes with large disc rotors and sprockets can make this process a little tricky, so press 2-3 more times to ensure the readings will be consistent.
On another note, it would be great if you could purchase pumps with built-in gauges. That way, you will not need to buy a separate gauge, which could save quite a few bucks.
Step three. Now that you already check the gauge’s readings, decrease or increase the PSI accordingly. You will need a pump for this step.
Basic bike-type floor pumps can easily do the job. However, if manual pumping is not your jam, turn to workshop compressors or electronic pumps instead: just set it to the optimal pressure, then press a button!
Beginner riders usually pump/deflate the tires to the factory’s recommended PSI and call it a day. Meanwhile, more experienced people choose to abide by the 10-20 rule: the difference between cold and warm pressure for the motorbike’s front/ rear tires should be 10%/20%, respectively.
Here is how to implement that rule in actual practice:
- Set your tire pressure to the motorcycle manufacturer’s recommended number.
- Take your bike for a ride (about 20 or 30 minutes) to warm the radial tires up. Then measure the pressure again.
- The warm pressure should be 10% higher (for front tires) and 20% higher (for rear tires) than the factory’s setting. If the number is less than that, give your bikes 2-3 hours to cool down, then release some air.
How to Know Your Tires Are Under-/Over-Inflated If You Don’t Have A Motorcycle Tire Pressure Gauge?
Heavy steering, wobbling, premature tire wear, low seat height, and decreased traction are the telltale signals of improperly-inflated tires. Overinflation also increases the risks of flat tires, as their rigid sidewalls fail to navigate around road bumps and sharp objects.
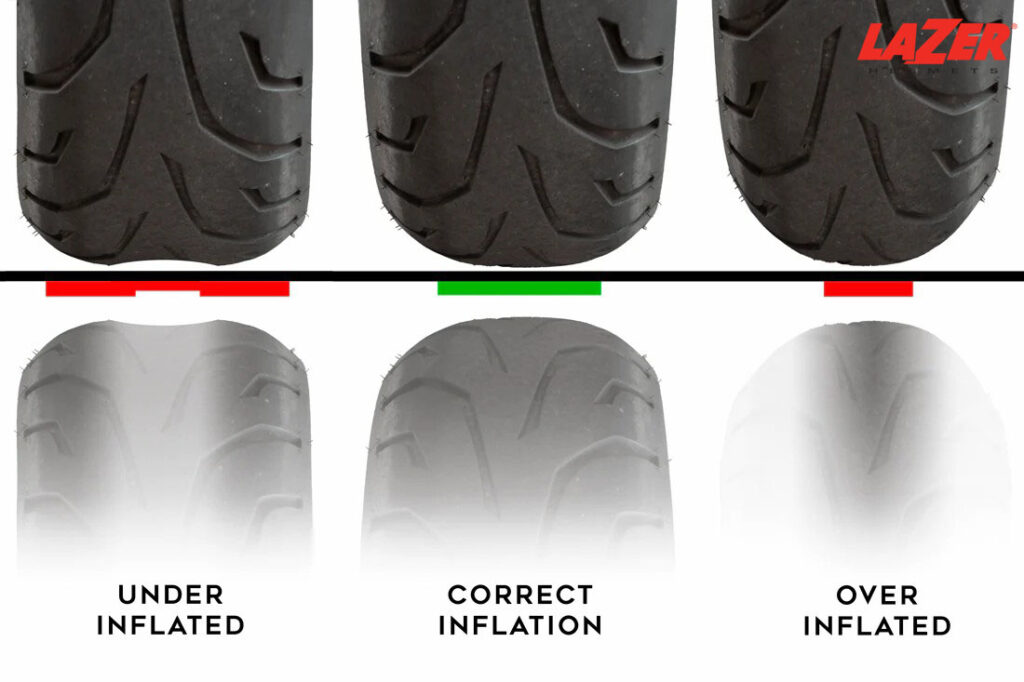
Underinflated Tires:
- Wobbling: Tires that shake and vibrate even on extremely smooth road surfaces indicate a lack of air pressure.
- Heavier steering: Pay attention to how the bike steers on the road. Do you need to exert extra handlebar force for proper control? Then that is a sign, stemming from tire deformation caused by underinflation issues.
- Premature/uneven wear: Tires with low air pressure result in wider contact patches and excessive tread usage. As such, they deteriorate faster than expected, demanding early replacements.
- Low Seat Height: Lack of PSI compresses the suspension more than necessary, which reduces the seat height.
- Decreased Traction: Slightly lower pressure can actually improve traction and grip in several cases. But excessively low PSI is a different story. Aide from a much worse grip, the bike will suffer from overheating tires, too, increasing accident risks.
- Vibrations In The Bike’s Handling and Control. That should not come as a surprise. Overinflated tires are much more rigid than regular tires and hence, fail to deflect and absorb road imperfections. As such, vibrations will likely occur.
Worse, such over-inflated vibrations will transmit to every other bike compartment. Your frame, hubs, wheels, and all other devices that come into contact with your back and hands are suffering, too.
- Flat Tires/Tire Failure. Rigid as they are, over-inflated tires will refuse to bend on sharp objects on the road, like nails or glass pieces. These objects may plunge straight into the tire sidewalls, causing flat tires.
How Often Should You Check Your Street Glide Tire Pressure?
About once per week would be the safest bet. But it’s best to check the PSI whenever you head out with your motorbike. If you ride on a more frequent basis, check the pressure twice a week to ensure safety.
Conclusion
Pumping your tires to the brand’s proper tire pressure specifications is a good move, though you should also consider your body weight, riding type, and terrain to ensure the best fit.
Check the tire pressure at least once per month, and bring the bike to tire shops as soon as possible if there are any unusual/weird signals that inflation cannot fix.