Motorcycle batteries are the backbone of the bike’s performance; without them, your motorcycle is not different from a dead horse.
As such, charging a motorcycle battery (with or without chargers) on time is of paramount importance. I am more than happy to share those secrets with you.
Table of Contents
How to Charge A Battery On A Motorcycle?
Basically, you must locate and take the battery out before linking it to the charger (red to positive, black to negative). After completely charging (12.73V), disconnect the battery and put it back in place. If you don’t have a charger, jump-starting or push-starting might also help.
1. Using Battery Chargers
Using chargers is the easiest and most basic method. If chargers are unavailable – or, for some reason, it just refuses to work – you can try to jump-start your bike with a starter pack/donor bike, or push-start it from the hill.
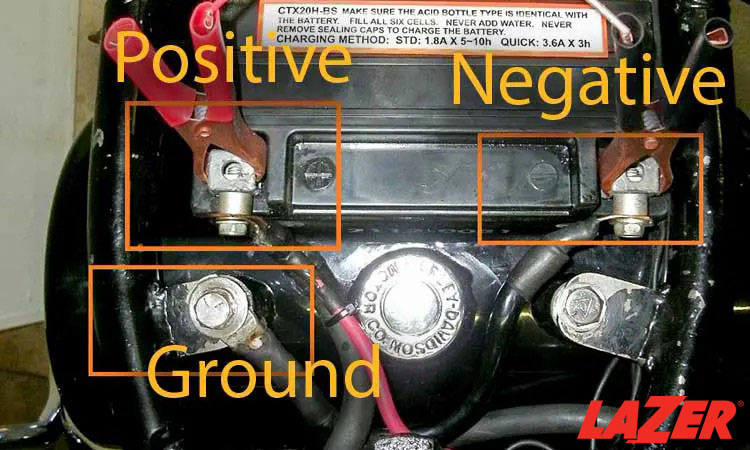
Step 1. Identify Your Battery Types
Motorcycle batteries are categorized in numerous sizes and shape options, so look up the manual if you are unsure what type your bike uses. Another way is to locate the information on the batteries themselves.
Regardless of the battery types, smart, float, or trickle chargers are usually the most common, as they can work well for mainstream battery types like glass-mat, gel, and lead-acid. However, tread with more caution if you use lithium batteries; consult with the manufacturers to be sure.
- Trickle/Manual chargers: Popular and easy to use, these chargers convert AC to DC to power up your bike. You have to keep an eye on them to turn them off in due time, by the way; otherwise, the energy will keep being pumped and lead to overcharging problems.
- Float chargers: Another popular charger type, it provides gentle and constant currents to your battery
- Smart chargers: They monitor the charging process on your behalf, cutting off the currents right after the batteries are full to minimize damage. Unfortunately, they do not match lithium batteries.
- Specialized chargers for your lithium batteries: Lithium batteries incorporate special lithium phosphate, lith-iron, and lith ion, requiring special chargers. The information is usually specified in the owner’s manual, so scan it to confirm which chargers your bike will need.
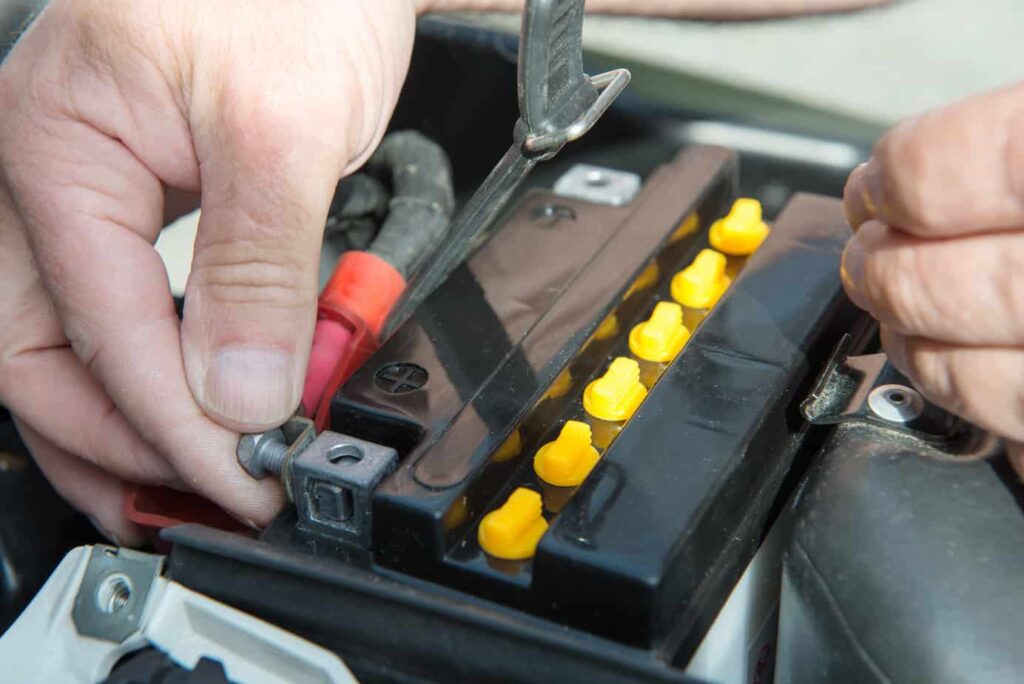
Step 2. Remove The Battery From Your Motorbike
Do not leave the batteries inside your motorcycle during charging; the currents might end up destroying other components.
Instead, remove the battery cables (negative first, then positive) and free them from any wire/link connecting them to the bike’s body. Lift the batteries off the bike.
The process might be trickier than it sounds, so it would be great to have a manual with you before you start. The guidelines should detail the battery’s positions and ways to access/disconnect it.
Applying instructions for other bike types to your own is out of the question – since, as mentioned, no bikes are similar.
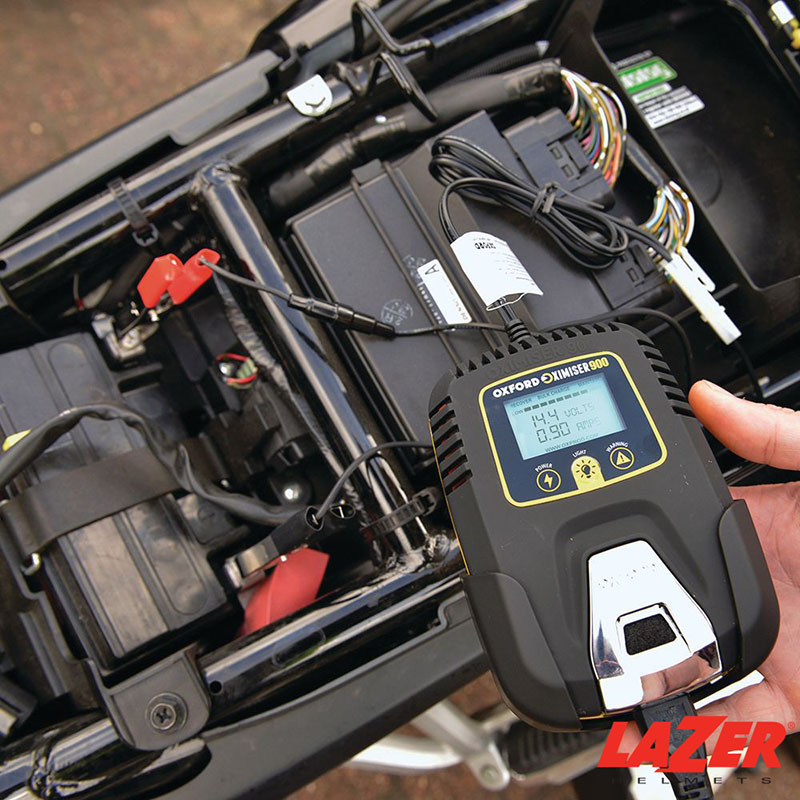
Step 3. Connect Your Battery Chargers
Attach your chargers to the terminals (any order is possible) and ensure they are connected properly. Once done, plug the chargers in.
The charging process will create hydrogen gas (a substance known for its high flammability). Overcharging is also the reason behind hydrogen sulfide, notorious for human health. Hence, keep accidents at bay, choose a dry and well-ventilated place for this step.
Also, if you use non-smart charging methods (trickle/floating chargers), monitor them constantly to avoid overpowering your battery.
Step 4. Confirm Whether Your Batteries Are Charged

Skip this step if you use smart chargers; they will automatically shut off and notify you of the battery’s full-charge status. But for other chargers, voltage tests are a must:
- Disconnect the chargers from the battery terminal.
- Plug your battery leads into the DVOM/multimeter (COM slot for black leads and V slots for red leads). Next, turn the DVOM onto the scale’s 20V DC sections.
- Ensure the bike is completely turned off, then link the black leads to the battery’s negative post (and read leads to positive). Record the readings.
- Interpret the result: 12.73 V or more means full batteries. 12.06 to 12.62V implies your batteries need longer charging time. Below 12.06V are broken/ruined batteries; either charge them more or seek replacements.
Step 5. Install your battery on the bike.
Now that the charging is complete, unplug your battery charger. Refer to the manual one more time to confirm ways to safely and properly put the batteries back in their place.
Attach the cables (positive first, then negative). Your bike should be up and running at this point!
2. Jump-Starting
2A. With A Jump Starter
Step 1. Turn off both the jump starter and your bike to avoid electrical accidents.
Step 2. Connect the cables
A typical jump starter pack arrives with numerous attachments and assortments – but cable clips are by far the most popular. Connect the clips to the terminals:
- Link the positive clips (red handles) to positive terminals (labeled + or POS)
- Link negative clips (black handles) to negative terminals (- or NEG) or the bike’s bare metal surfaces.
- If you cannot reach either of these terminals, try linking the clips to the chassis’ terminals (where the bike connects to your battery).
Step 3. Switch On Your Jump Starter Packs
Certain modern packs introduce numerous voltage settings (to cater to different batteries). Hence, ensure yours are adjusted to the right voltage setting. As you will be charging a 12V motorcycle battery (for the most part), the setting must be 12V.
Step 4. Start Your Bike
Crank the bike several times – and each time should not last more than 3 seconds. After all, jump starter packs are meant to deliver short power bursts, so excessive cranking might risk burning it out.
After the bike has started, remove the clips (negative first, then positive).
What if it doesn’t start, though? Wait for 5 minutes for the starter pack to cool down, then try again. If it still doesn’t move an inch, your battery is either completely dead or fails to hold charges; have it fixed.
Step 5. Disconnect Your Jumper Cables
After disconnecting the clips (negative then positive) and jumper cables, ride the bike around for 15 to 30 minutes to help the battery recharge.
Skip this step if you plan to replace the entire battery.
Step 6. Recharge Your Jump Starter
Bike cranking consumes lots of power and inevitably drains the starter pack. Charge your jump starter afterward to prepare yourself for emergencies in the future.
2B. With Another Motorbike (Or A Donor Bike)
Step 1. Find The Bike’s Battery Terminals
Turn off both bikes and put them in neutral, then find the terminals. Most battery terminals are located below the bike’s seat (though you should, again, check the manual for this matter).
If they are inaccessible or hard to reach, try the chassis terminals instead.
Step 2. Connect Your Jumper Cables
Follow the precise connecting order below to minimize failure risks:
- Attach a positive clip (red) to the dead battery’s positive terminal (labeled +, POS, and usually have plastic, red rubber covers). Then attach the remaining positive clip on the good battery’s positive terminal.
- Attach a negative clip (black) to the good battery’s negative terminal (labeled – or NEG). Once done, attach the remaining negative clip to your dead bicycle’s metal surface. That way, it can prevent potential battery damage.
Step 3. Start The Donor Bike
Let the bike run for 1-2 minutes to ensure its batteries are fully active.
Step 4. Start Your Own Bike
You might have to redo it several times before the motorcycle successfully ignites. Check all the bike connections to locate unusual symptoms (if any), and keep both motorcycles running for 2-3 minutes for charge build-ups.
Step 5. Disconnect Your Jumper Cables
Remove the clips (negative first, then positive). Run the bike for 15 to 30 minutes to help the battery recharge.
Skip this step if the battery is on the verge of its shell life and requires replacements; instead, just drive to a nearby shop and purchase new batteries right away.
3. Push-Starting
Step 1. Prepare The Bike’s Rolling
Getting the bike to roll is a critical part of push-starting, so you have to get the motorcycle in a pre-rolling position in the first place to smooth out the remaining steps.
- The best scenario is to take your bicycle to a hill, then let gravity take care of the rest later.
- If you cannot find any hills, find a flat, even area, then ask for a second helping hand during the pushing.
- What if you are on your own and there is no hill? Just find a flat ground and prepare to exert as much effort as possible.
Step 2. Put Your Bike In The Second or Third Gear
Avoid the first gear at all costs; engaging them in this stage might lock up the wheels and cause serious crashes. Plus, most engines do not have enough captivity and compression limits to turn the bike successfully via 1st gear. Hence, always stick to the second or third.
Step 3. Hold In The Clutch And Push
Pull in the clutch (ensuring the second or third gear is still engaged) to start rolling the bike; push it from the hilltop or ask your friend/fellow rider to lend a helping hand. Do not stop until the bike engine starts.
If desired, you can make the bike roll as quickly as possible to increase the success rates. But from my past experience, the jogging speed is usually more than enough.
Step 4. Release Your Clutch Once Rolling
Now that the bike is rolling, release the clutches to let the rear wheels turn your engine over. The physics involved is quite similar to starter motors – except that you are relying on the bike’s momentum, not the battery.
After a few minutes, give the bike a little bit of throttle. Once the engine has officially started (not just turned over), pull back the clutch and rev up your bike to maintain its run.
Step 5. Start riding!
Keep building up the revs to make sure the engines do not die or choke.
Think about why you had to resort to push-starting methods in the first place. If technical issues or starting troubles are the culprits, keep your motorbike running throughout the rest of the trip so that you don’t have to push-start it a second time.
And provided that the bike’s charging mechanism is still working fine, engine revs will also help your battery recharge. Ride to the closest repair shop and ask for further diagnosis.
Note: If your bike refuses to crank up after trying all 3 ways above, there is a good chance that the battery is completely dead or the charging system is in trouble.
How Often Should You Charge Your Motorcycle?
Every month (or 30 days) is usually the safest bet, though the weather, the battery type, and your riding frequency all have a say in your charging schedule.
We cannot guarantee the exact number due to the diverse array of motorcycles and engines. It would be best to consult the manual – or, if the manual does not specify it, check the battery’s condition using the voltage test above.
How Should You Store Your Motorbike Batteries To Minimize Drainage?
Store them in a dry, safe place at temperatures above 0°C or 32°F, and regularly charge them – even during storage periods – to keep drainage at bay. If you do not plan to use the motorbike for weeks (or even months), purchase battery maintainers to keep the batteries well-protected.
See more: How to Store Motorcycle for Winter?
Extra Tips to Extend The Motorcycle Battery Life
At least once a week, check the terminals for corrosion signals and inspect their electrolyte levels. If the battery plates are not fully submerged, add some distilled water; also, do not forget to clean its deterioration and debris with wire brushes.
Conclusion
There are three different methods to charge a motorcycle battery. Overall, chargers are still the best and safest solution; only use the other two (jump-starting and push-starting) when chargers are out of reach, or there are issues with your bike’s system.
See more: What Is A Stator on A Motorcycle?