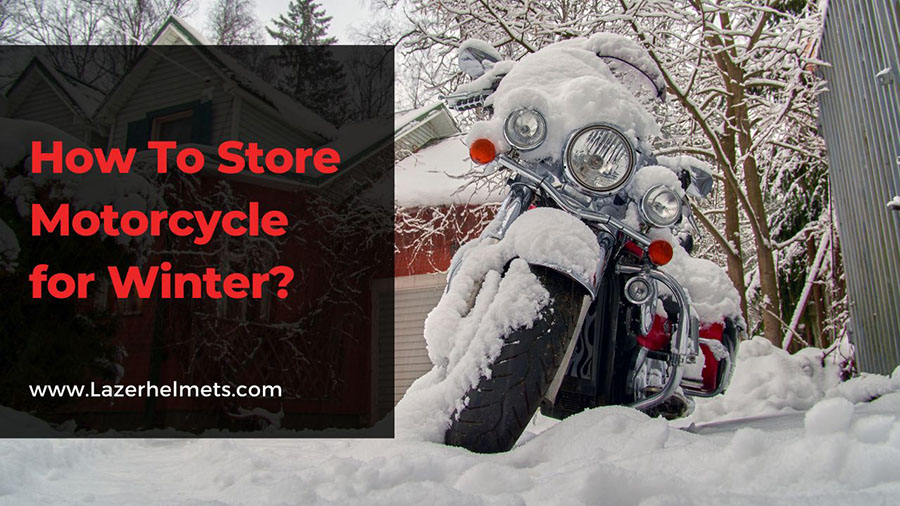
We understand cyclists’ burning passion for enjoying their freedom and adventurous spirit on highways all year round. Unfortunately, some regions suffer from extremely freezing weather conditions during winter months. Hence, they have no choice but to stay home, waiting for the first batch of spring sunlight!
And contrary to popular belief, even a disused motorcycle must still be well cared for. Otherwise, its compartments and features will get rusted and deteriorate, unable to wait until spring!
Here is where we enter the scene, ready to deliver excellent tips on winter motorcycle storage.
Table of Contents
Storing Motorcycle for Winter: Step by Step
Step 1. Clean Your Motorbike Well
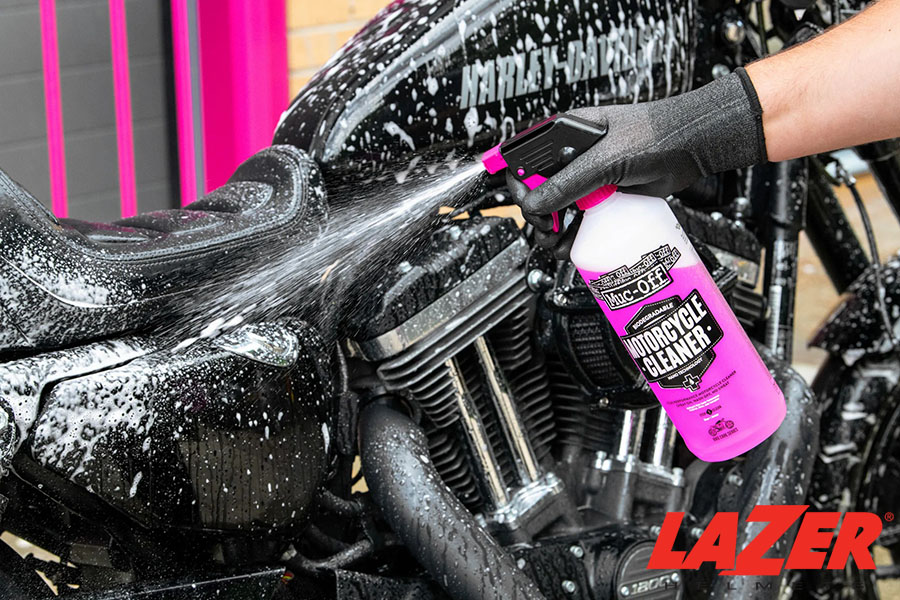
Temp fluctuation, condensation, and dirt can combine to create a terrible corrosion disaster. How should you prevent such catastrophes? The simplest way is to put the motorbike away buffed and clean, giving it an excellent detailing job.
But what if you have forgotten this important step and already stored the bike away? No worries; you can still compensate for this absent-mindedness by using high-quality wipe-cleaning and spray products in the garages.
We suggest applying WD-40 on a cloth to scrub the stubborn metal parts (except the brakes) before pressing a layer of coax to the painted features.
Some riders like to leave this wax layer throughout the water and strengthen it further when spring comes. That’s quite a great idea, providing a good protective coat for your precious automobile!
Step 2. Lubricate Every Moving Part
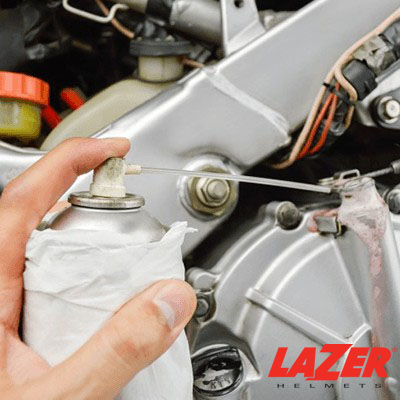
Do you plan to store your bike for at least several months? Aside from the wax, you should also cover the moving parts with light oil coats, preventing future moisture buildup.
One method is to extract the bike’s spark plugs before pouring oil into their holes (about one tablespoon). After that, turn over the engine to coat its cylinder walls, put the bike in gear, and spin its rear tire. Once done, return the plugs to their places.
You should perform this step right before the storage. Also, double-check the controls, cables, and chain to guarantee they are all freshly lubed – capable of withstanding dry and cold winter air.
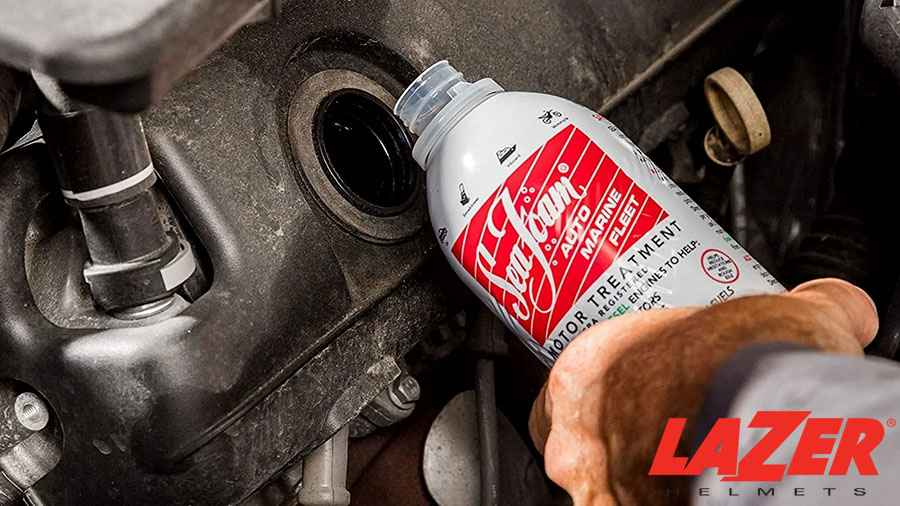
Step 3. Change The Oil in The Engine
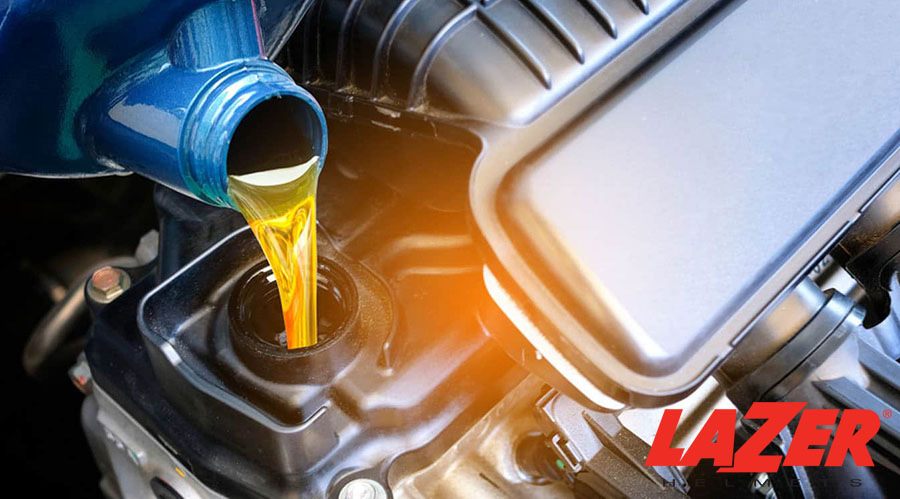
Like the bike itself, the engine should stay clean during storage. Thus, performing a is highly recommended, which helps flush out toxic and harmful contaminants for long hibernation.
What to put in a motorcycle gas tank for winter? Well, high-quality engine-cleaning products (such as Sea Foam) enjoy exceptional water absorption qualities; just small amounts are more than enough to freshen up the engine tank. They also dissolve most varnish deposits – and even better, are totally engine-safe.
Step 4. Top Off Your Tanks and Add Extra Fuel Stabilizer
The longer your tank sits, the bigger the trapped air volume will get, wrecking more havoc on the fuel system.
Worse, temp fluctuations in sealed environments will evaporate the air moisture, leading to inevitable condensation. The metal tank will corrode, form rust, and clog the jets, injectors, and filters. Once the water has evaporated, you will end up with sticky varnishes.
Fortunately, a good fuel stabilizer (ex: Sta-Bil) can prevent such procedures.
Before putting your bike away, keep riding until the fuel has almost run out. Then bring the stabilizer to some fuel stations and add it to the tank. On your way home, the stabilizer will enjoy enough time to blend into the system.
Step 5. Empty Every Carburetor
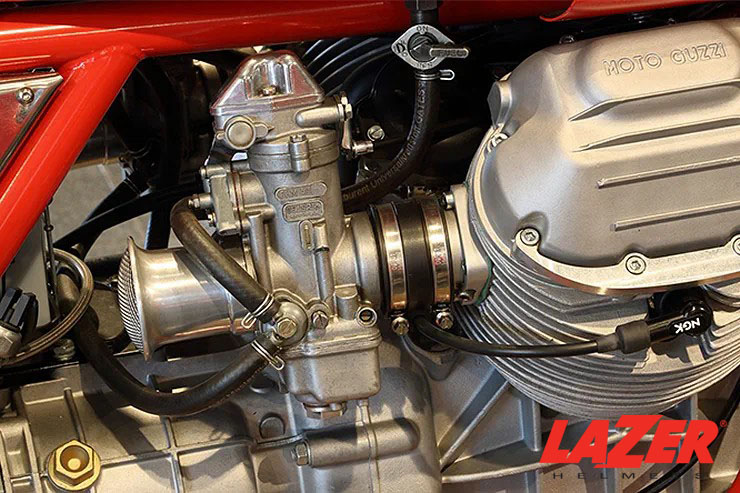
People with fuel-injected motorbikes can skip this step. But for carbureted motorcycles, you must get all fuels off the carbs to keep needles and jets from plugging in your old fuel.
So what is the most recommended method to run it dry? First, turn off the fuel-supplying petcock/valve. Then keep the bike running until its gas is used up.
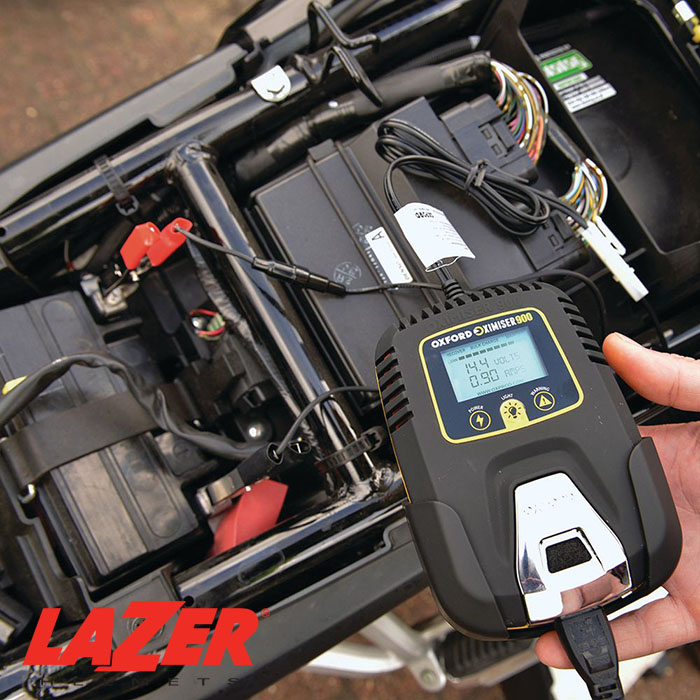
Step 6. Extract The Batteries and Hook Them To Trickle Chargers
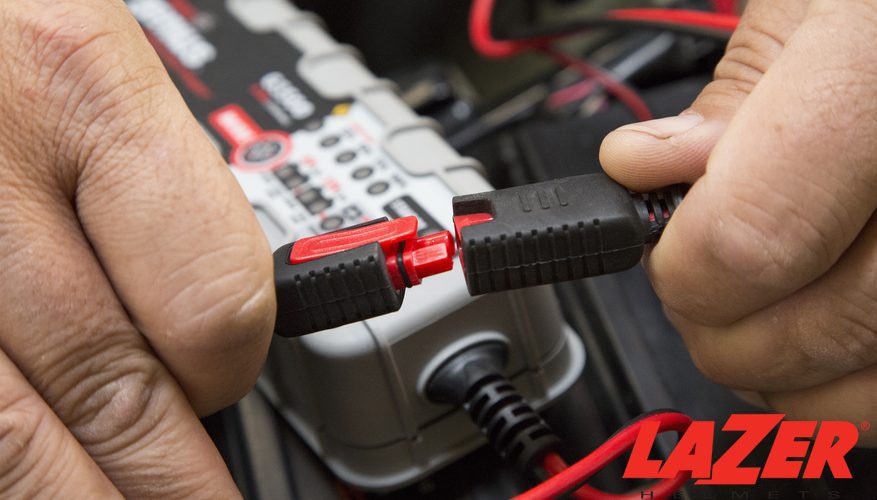
You have two choices: remove the batteries entirely or keep them on the motorbike (for shorter storage).
For riders opting for the latter (keep the batteries), ensure you turn on the motorbike monthly to perform battery charges.
Still, the most optimum solution is to remove your batteries 100%, storing them in a different location with little to no temperature fluctuations. After disconnecting the batteries and cleaning the electrodes, hook them to trickle chargers and leave them there all winter.
Step 7 (Optional). Buy New Chargers
Are you afraid that the batteries will discharge during winter? For those with a pretty generous budget, we suggest saving up for new batteries. Buying 12V chargers is the greatest investment to sustain the bike’s quality.
Stay alert with cheap battery chargers (around $10 or even less). Products like these do not offer float charges but will work constantly regardless of your battery conditions. That might sound amazing at first, but trust us, it brings more harm than benefit!
Step 8. Use Muffle Plugs to Stuff The Exhaust Pipes and Air Intake
Fill in all the bike’s open sections to protect it against the invasion of pests and rodents. This phase is especially important if you store the motorbike in or outside barns.
Muffler covers are amazing choices for this goal, though many people also succeed with simple plastic bags. One note, though: do not forget to remove those items once you bring out the bike in spring!
Step 9. Inflate or Elevate The Tires
Motorcycles parked in the same area for a long period of time will cause flat spots. You can elevate the bike to lift the tires off the floor to tackle this dilemma. Another option is to inflate their pressures by around 20 percent.
Note: Oftentimes, there is only one tire off the ground when you elevate the motorcycle. Let’s say your rear tire is lifted; you’d better deflate it and inflate the front one only and vice versa.
If you have no way to lift the bike, then increase the air pressure on both tires to the recommended PSI and check it once a month.
Step 10. Cover The Bike
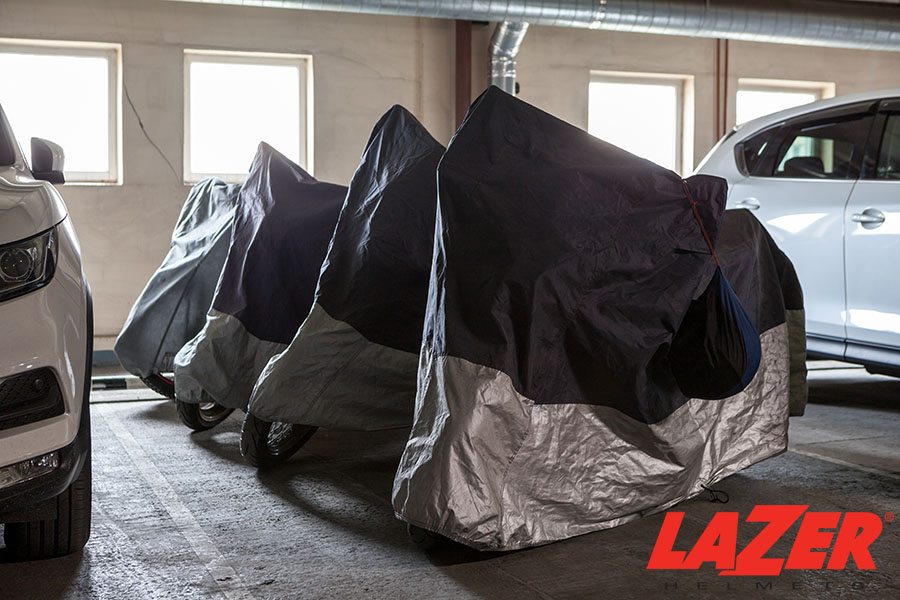
Choose a great motorcycle cover to draft over your automobile. Seasoned riders often use moving blankets, drop cloths, and old sheets – the choices are endless! Remember to ensure their sizes fit your bike perfectly, which will provide it with better protection.
Step 11. Choose A Great Storage Location
Some people can gain easy, free access to household motorcycle storage. Others, meanwhile, are not so lucky; they must rent a unit to keep their bikes throughout the winter. The cost depends on the area’s quality and availability at that time.
How Long Should You Store Motorcycles Without Using It?
Without proper storage, a motorbike can sit idle for around one month at best. Any period longer than that requires meticulous storage methods already discussed in the article – but even in those cases, it would be best not to keep them unused for more than two years.
Otherwise, the motorbike will easily run into numerous technical problems that will significantly damper its performance, such as:
- Paint peels atop the tank
- Unlubricated and stiff chains
- Rust
- Fuel gelling up
- Condensation buildups in the engine and carburetors
- Battery drains
- Brittle tires that get flat
- Cracking and shrinking gaskets and seals
- The tank’s paint peels
See more: How Many Miles Do Motorcycles Last?
Can Extreme Weather Hurt My Bike?
Unfortunately, the answer is yes – which is why we strongly recommend winter storage in the first place! Sudden temp drops, fluctuating weather changes, and cold snow can take a devastating toll on the motorbike’s quality and lifespan.
Some of the following are just a few of the numerous issues your bike can encounter:
- Decreased pressure in the tires
- Rust that eats away the wheel spokes, forks, and exhaust pipes
- Drained/slowing down batteries, affecting the computer, lights, and radios
- Thicken fluids that leave sticky deposits in the engine tank and carburetors
- Corroded metal parts.
How To De-winterize My Motorcycle When Spring Comes
How about de-winterizing? Perform the following procedures:
- Visual Check: Check the suspension and rear wheel and remove any lingering rust that might have developed. Ensuring the air filters are open and clean.
- Fluids Check: Inspect the fluid and oil and wipe off metallic flecks. Should there be any physical damage, bring the car to professional services.
- Chassis Check: Grease the flex points and linkages. Also, look for cracks or minor damage that might occur on the weld lines.
- Battery Check: Remove and reinstall the battery. Then check the brake lights, turning lights, and headlights.
- Tire Check: Gauge its pressure to see whether it has been inflated. After that, ensure the treads are even, with no sidewall damage or crack.
Conclusion
What are the best methods for winter storage for motorcycles? And once spring arrives, how should I de-winterize these beasts, readying them for the new adventures ahead?
This article has explored the issue deeply, giving you one of the most inclusive and detailed guidelines you could have found. The steps are broken down into extremely small portions, making them easy to understand and track – even for novices!
This way, you can be confident that your precious motorbike will not wear down during long periods of disuse. They will be as good as new when you are ready to ride them on the street again.