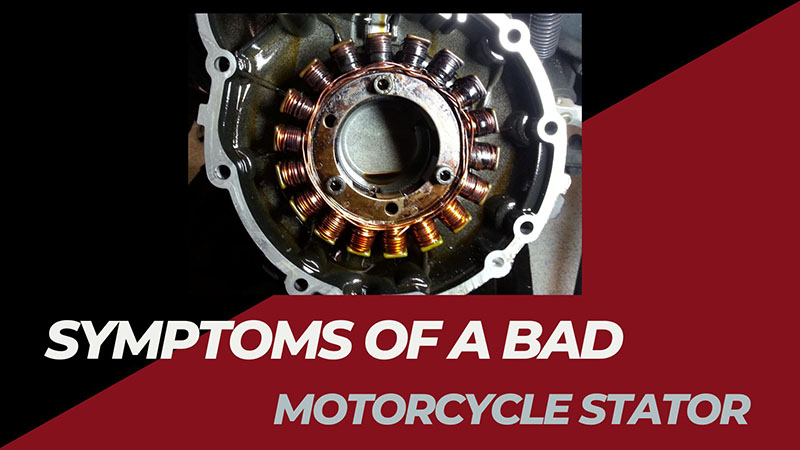
Most of you have heard of alternators – a critical element that powers your motorbikes and cars throughout the rest of the trip. But few know the alternators’ core element- the stators. Without them, there’s no way the alternators can function the way they are supposed to. Taking good care of the stators is a must!
Here comes the important question: What does a bad stator look like? How to recognize their defects and malfunctions and treat them on time?
Again, readers can count on our expert team in these regards, finding the answers they need in this insightful article.
Table of Contents
What Are The Symptoms of A Bad Stator? Why Do They Occur?
Some common signals to look out for are: zero/weak spark; dead/dim bike lights/charging lights/headlights; dead batteries or electric components; and lagging acceleration.
A. Symptoms
1. No/Weak/Intermittent Spark
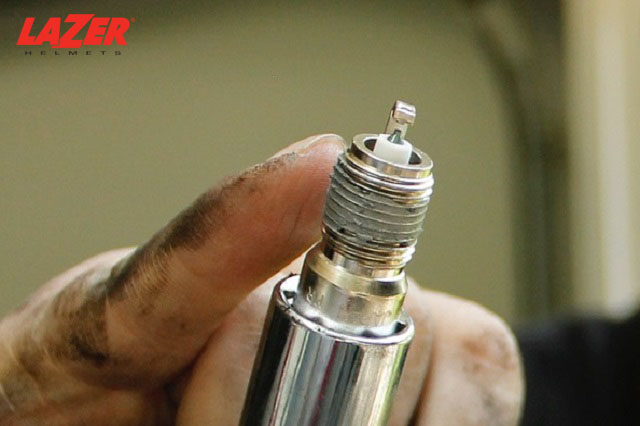
Spark issues are the most common symptoms of failing stators, known as “Misfiring.”
If you haven’t already known, stators are directly responsible for producing the required spark for your spark plug. Once they malfunction, the motorbike will receive insufficient – or worse, zero – sparks.
Such phenomena can occur regularly or sporadically; if your case is the latter, it might take a while to recognize the signals.
There are also instances where the motorbike only suffers from minor “misfiring” but gets worse over time due to lack of treatment and eventually drains all the spark off the engine. You can not start the bike at all!
And that’s understandable – since stators and electricity are tightly interconnected, a lack of electric currents will result in dead motorbikes.
See more: Lean Spark Plug Reading Chart
2. No Life Signals from The Bike Light When The Engine Is Cranked
Do you spot no life signal from the motorbike light? That means it receives no power at all, whose root causes are probably the stator or fuse box.
Your best bet is to ask someone to crank the engine over while you stand at the side looking for the bulb’s spark. If the light still refuses to turn on, your bike stator is clearly in trouble. Time to have it fixed!
3. No Charging Lights on Dashes When Riding
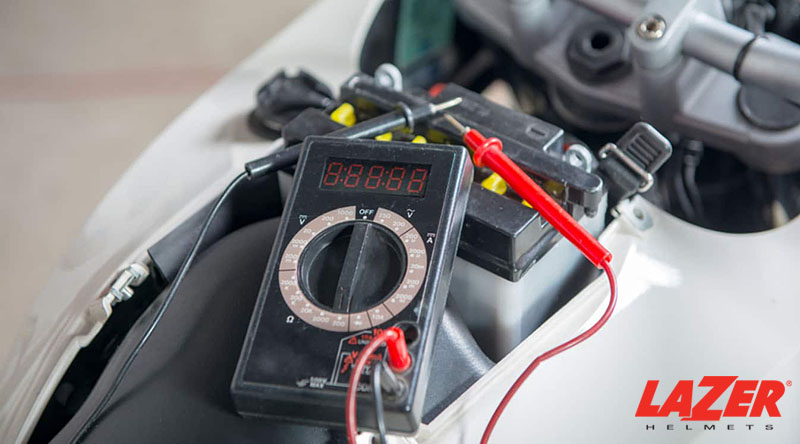
Bikes that are incapable of charging during the ride hint at problematic stators. To confirm whether that’s indeed the case, you might need some help from a voltmeter.
First, turn the headlight on – and other lights on the instrument panels as well. Then observe the exact voltage amount delivered to every bulb when you ride.
Should there be no delivered power – and the voltmeter needle doesn’t move – that implies your stator doesn’t produce any charging current. Even when you try to switch the ignition, the charging lights still fail to illuminate.
Nevertheless, a further diagnosis might still be required – since other factors (like internal electrical system issues or battery problems) can also be the potential culprits.
4. Dead Electrical Components (Accessories, Gauges, etc.).
Aside from lights, if you recognize that other electric-involved components have gone out completely – or the instrument panels stop giving you any readings – your stator is suffering.
In these cases, the electricity system might have exceeded the regulator’s limit, causing short circuits and severe overvoltage.
5. Dim Headlights
With a malfunctioning stator, chances are that the bike’s top headlight will look much dimmer than normal.
Since the stator – which powers the ATV’s ignition system and electric accessories – has gone dead, the only power source for your headlights is the battery, hence its fading color.
6. Batteries Go Dead When You Turn On The Lights
As no sufficient voltage is supplied, you will realize that the battery may run down much faster than usual – especially when riding through the night with all the headlights on.
Bike headlights demand lots of energy, after all, which exhausts the battery at a startlingly alarming speed.
7. Lagging Acceleration
The last symptom of stator failure – also easy to recognize – is downgraded acceleration. As insufficient electricity is produced, the ATV can only receive energy from the battery – a compartment not meant to support the whole ATV for extended periods.
As a result, the battery juice will run out in a blink, causing a sluggish ATV that refuses to give you smooth acceleration.
B. Why Do They Occur?
1. Time
Anything – not just motorcycles – tend to degrade and wear down over time. Your stator clearly is not an exception.
Although it enjoys great protection thanks to the rotor casing – which shields it against external elements – do not forget your bike is still constantly exposed to vibration, cold, and heat.
Even the best bike stator out there can only withstand them for several years or decades before breaking down.
2. Heat
Overloading the stator is the fastest route to destroy it.
When manufacturers set up the electrical system of the motorcycles, they equip it with a high-performance power-generating program to course through all the ancillary components (ex: engine, lights).
Though some bike models will store a bit of extra power, most smaller engines do not have that luxury.
Despite that, many stubborn bikers still add extra accessories to their motorbikes, such as heated grips, lights, sat navs, and phone charging points – all of which require more electrical power. That’s too much for your stator!
Imagine riding your bike in winter – both the headlights and heated grips will be on. You might even use mobile phones or heated jackets plugged straight into the charging sockets.
The stator is not meant to handle that much power, generating excessive stator coil heat that can damage the rectifier and wreak havoc on the copper cable.
How to Rebuild A Bad Motorcycle Stator
Step 1. Uncoil The Stator
The job can be tedious since removing its epoxy is a bit challenging. We suggest using screwdrivers to lift the inside wire between the bike’s poles.
Always exert caution during copper wire handling; some insulating paint pieces (still connected) have sharp edges that might scratch your skin.
Step 2. Prepare The Support
Before recoiling, prep its surface and smooth all its sharp edges with a mini drill or file. This step is important – especially if you mistakenly removed the wrong residuals in the first step and had to redo everything.
Some experts suggest preparing mylar cardboard pieces (about 30 to 40 pieces, similar to those used in transformer winding) and covering the poles with them.
Step 3. Coil Up
Get an AWG wire (commonly about 0.95mm diameter) and copper wire similar to the original. You can purchase them at any rewinding electric motor shop. While at it, buy insulating paint as well; we will need that later!
Now wind the stator using these wires. A recommended tip is to hook a multimeter (digital) to the phase end and metal body.
If there are mismatches between your sharp edge wire and the metal bodies (ex: the coil is moved in the wrong direction), this multimeter will buzz, signaling you to unwind them immediately and redo this step.
Step 4. Add Some Finishing Touches
Now, most of the process has already been done! Your only job is to submerge the stator into the paint and then put it in an oven. Heat the oven to 300F for about half an hour. We suggest doing this in two rounds to ensure the tick layer formulation.
Once the paint cools, let’s solder back the connector wire. Congratulations!
How to Replace Bad Regulators If You Cannot Rebuild It
Step 1. Use special tools (ex: socket drivers) to remove the nuts and the alternator covers. There are usually two covers.
Step 2. Next, remove the alternator’s brush cover. If it’s too tight, insert needles into the holes and twist.
Step 3. Unscrew the alternator screw and cut off its copper leads using wire cutters.
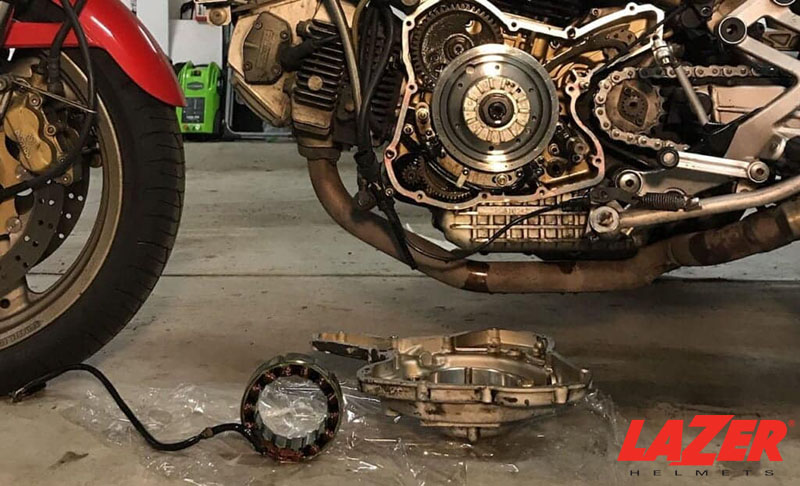
Step 4. Detach the pulley, then separate the stator and rotor. Pull off the current stator to replace it with a new one.
Step 5. Return the cover, screws, and lead to their original position. Your replacement stator has been set!
Is It Possible To Run The Bike Without Stators?
Yes, but only if the bike stores extra power in the engine (which is uncommon and only spotted in premium bikes, by the way). Otherwise, it’s a lost cause; your bike will fail to start in the first place, let alone run for miles!
Conclusion
Our post has addressed all the most common potential signals you can observe with naked eyes when the stators refuse to work properly.
Two effective solutions are at play: rebuilding the faulty stator or buying a new one – both of which have been covered with detailed, easy-to-understand guidelines. Trace along with them carefully!
As always, it’s better to be safe than sorry. Instead of neglecting your car for months, always check the stators – and other automobile parts – at least once a week and keep a monthly maintenance schedule.


Thank you for the education Sir.