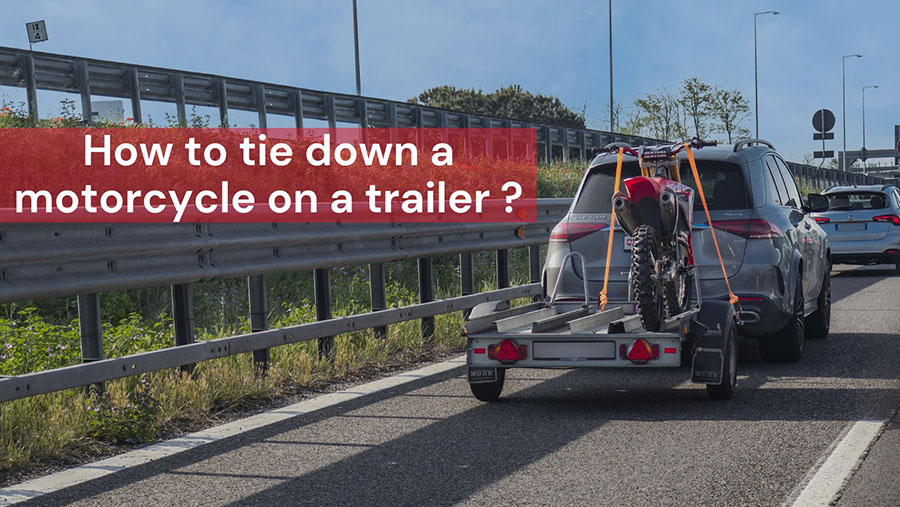
Motorcycle transportation is by no means an unfamiliar sight, which might occur for numerous reasons (for example, your family is moving to a new apartment).
However, to our horror, many people do not know how to carry out this process safely, violating even the most general rules of thumb and destroying the bike’s quality during the entire trip.
Fortunately, you can again trust our expert team regarding this headache-inducing issue. This article will deliver excellent tips and step-by-step guides on how to strap down a motorcycle. Keep scrolling!
Table of Contents
Tie Down the Motorcycle in the Trailer With 11 Steps
This section will reveal smart tricks to do the task safely. Trace along our guides!
Step 1. Connect The Trailer’s Back and The Wheel Chock
“Motorcycle wheel chock” refers to the front tires’ slots, keeping them straight during the bike’s transit. You can purchase them at any online or automotive stores.
Start the hauling process by attaching the chocks to the pickup truck or trailer bed. Next, please place it in the bed’s back section and bolt it tightly down.
Step 2. Load The Ramp
Use specialized motorcycle ramps that can withstand the bike’s weight and attach them to the bed of your entire trailer. Once done, roll the bike gently onto the bed; remember never to let your fingers go, or it will flip over!
We suggest calling for a second pair of helping hands. Two people – each taking charge of one side – will make it much easier to transport a motorcycle on a trailer.
Step 3. Place The Bike’s Front Wheel Onto The Chock
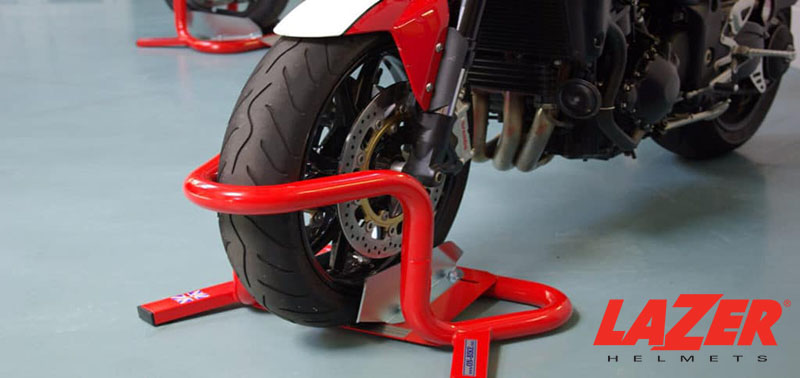
Roll the motorbike to the trailer’s back while resting its front wheel on the chock.
Most chock mechanisms will click once the wheel enters fully. After hearing that click, you can be confident that the vehicle is situated in the right position.
Most importantly, never lower the kickstands. Sure, you may pull them out while gathering the equipment; but do not forget to raise them again before you start to tie down the motorcycle.
Step 4. Hold Your Bike Upright
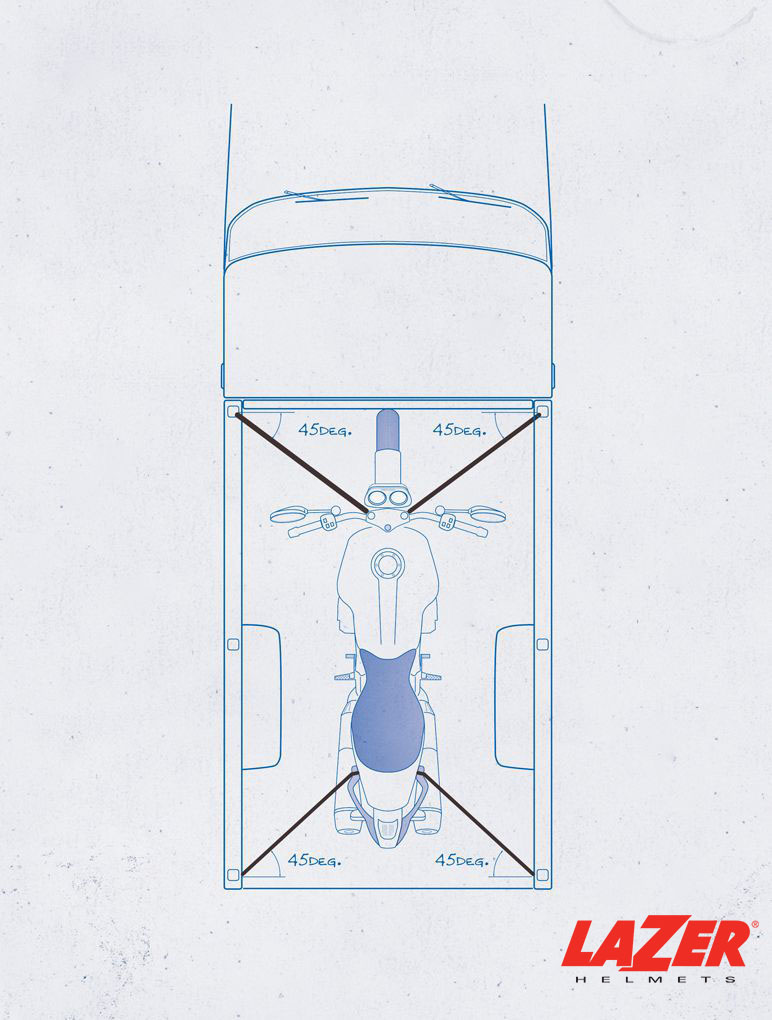
This step will be a piece of cake if you have a partner. Ask them to hold the motorbike upright straight without leaning to one side. We recommend asking your partner to place themselves on the motorbike – as if they were riding it – while planting both feet.
Step 5. Tie One Strap End to The Trailer Side
Purchase standard traps (preferably tie-down) easily accessible at any hardware store.
Move the traps above to make it level with the bike’s front tire (which side you begin with doesn’t matter). Next, tie the strap end to the body of the trailer. Pull on the strap to ensure its knots are secure.
Step 6. Loop The Straps Around The Suspension Tube
Pick a tube positioned in the same place/side you tie the trap. Then loop the strap around this tube above your shock absorber’s rubber parts.
Several motorcycle models also have cross braces made for tying. Please double-check whether yours has them.
Step 7. Clamp The Remaining Strap End to Your Ratchet Strap
Tie the rope – with a couple of ratchet straps attached – to your trailer (before the front tires). Loop them through the ratchets and crank the latter for better tightening. Once the straps feel taut under your fingertips, stop.
Step 8. Repeat Steps 5-7 With The Front Wheels’ Opposite Side
Now one bike side is staying put; let’s even it using another strap, with the same procedure as illustrated above.
Experts suggest snuggling the tie-down left front first – enough to pull out the slack. Then do the same with the tie-down right front side. With your bike staying upright, the kickstands should now lift off the ground.
Extra: For Soft Loops (Extension Ones)
Do you use extension loops around lower triple trees? Then set the ramp parallel to your trailer bed’s wheel chock. Push the bike straight onto the chock and into the trailer.
Step 9. Strap The Bike’s Rear for Better Stability
Pick high chassis regions to use these rear straps for better leverage. Your tie-downs must pull one or two inches downward at the attachment point. Ensure your bike does not rock sideways, back, or forward after finishing.
Step 10. Attach Your Excess Straps to A Ratchet At The Trailer’s Opposite Side
Tie your ratchet to the trailer’s opposite side and loop a common strap through it. Then crank the strap to strengthen its hold; keep going until it’s taut.
Step 11. Tie The Loose Ends Of The Strap to Avoid Flailing
A flailing strap may damage the motorbike when the trailer is driven at exceptionally high speeds. Prevent this catastrophe by tightening every end. You can do so by tying these parts to the truck/trailer or looping them around the sturdy portions on the strap. Tie one last knot to seal the deal!
Lastly, we suggest reversing one bike placement in the box trailers if you haul two motorcycles simultaneously and struggle with the interfering bike handle bumps.
Can I Still Tie Down My Bike in Gear Without Chocks?
Yes, absolutely! You can use numerous items as improvised chocks, such as plastic, brick, or wood chunks.
Still, remember that some fragile chock replacements only work best with small motorbikes. They might not be able to handle bigger ones!
Should I Cover The Bike When Trailering?
Yes – that’s something we highly recommend. Covering some vulnerable features (ex: the mirrors) will protect your bikes against unexpected damage and external forces much better.
Conclusion
This insightful article from our professional team has explored all relevant aspects regarding how to haul a motorcycle on a trailer.
A detailed step-by-step guide is also delivered, broken down into smaller steps that even beginners will have no trouble following. Keep them in mind – and remember to pay close attention when using the tie-down straps – to guarantee your beloved bike stays intact when arriving at the new destination!
Other aspects are also addressed, including the zero-chock hauling methods and bike cover issues.
See Also:

